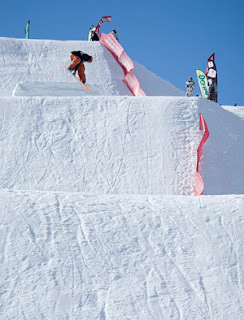
Snowboarding Tricks and Technique

How To Go Big On A Snowboard
You're learning how to jump, but for some reason your friends go so much farther off the same jump than you do! What's going on? Read on to find out the trick to going big on a snowboard.

Difficulty: Average
Time Required: practice

Here's How:
  1. The first element to going big on a snowboard is your speed. The faster you hit a jump, the farther you will be able to go off of it.
  2. Start at a point in the take off where you are comfortable going straight at the jump. Then pick a spot a little further uphill. Continue to build your speed by picking spots further uphill from the jump.
  3. The second element to going big on a snowboard is how hard you spring off of the lip of the jump. The trick here is to ollie, or jump, just as you take off. The harder you ollie, the higher and bigger you will go.
  4. To ollie off a jump, stay low with your knees bent as you approach the jump. Then, just as you are about to take off, spring off the tail of your snowboard while you lift up with your front foot.
  5. As you ascend into the air, bring both knees up toward your chest to continue your upward momentum.
  6. A good amount of speed combined with a good ollie is the key to going big on a snowboard. Extend your legs to land and ride away smooth!


Tips:

  1. Avoid speed checking -- turning to shed speed on your way to the jump. Instead, start from a lower spot to avoid too much speed and aim straight at the jump.
  2. Practice ollies on flat ground, then on rollers and other bumps in the snow until you are very comfortable with how they feel.
  3. Focus first on going big, then add in a grab or a trick once you are comfortable on the jump.
  4. As you land, focus on riding straight for a short while before you start turning to stop or slow down.
How To Build a Snowboard Jump
Find a hill full of snow and build your very own snowboard jump with these helpful tips. Then hike it all day and practice new tricks -- your riding will rapidly improve.

Difficulty: Easy
Time Required: up to an hour

Here's How:
  1. 1.Scout a location. Ideally, find a hill that starts off at a fair slope, then drops into a steeper section with a long enough run-out for a good landing. Build the jump just in front of the steeper section.
  2. Get out your snowboarding shovels (packable and lightweight with a big square shovel) and make a big pile of snow.
  3. Use snowboards as scaffolding for the front of the jump.
  4. Pack down the snow using a shovel or the base of a snowboard. Hold your board by its bindings and smooth out the top of the jump. If the hill drops naturally, you won't need a very steep lip.
  5. Smooth out the run-in with the base of a snowboard.
  6. Test it out! Make adjustments as necessary until everything feels just right. Have fun!


Tips:

  1. Take off in slightly different places to optimize the most good landings.
  2. The best way to learn a new trick is to practice it over and over on the same jump. Building a jump yourself will help you to quickly learn new tricks.
  3. Most resorts don't like you to build a jump within their boundaries. Go out-of-bounds if you can.

How To How To Do A Backside 180

A backside 180 is one of my favorite tricks. You can do it small while you're still learning, or huge and slow once you have it down. The technique is the same; the style is all yours.


Difficulty: Average
Time Required: Practice


Here's How:

  1. Ride straight at a small bump or roller with the base of your board flat.
    Stay flat-based until you're just about to take off.
  2. At the lip of the jump, spring off of your toes.
  3. Suck your legs up toward your chest and grab indy. (Once you've mastered the indy grab, experiment with grabbing mute, tail or doing a backside 180 method.)
  4. Rotate slowly because you're only going to spin 180 degrees.
  5. Look down between your legs to spot your landing.
    Let go of your grab and extend your legs for the landing.
  6. As you absorb the landing, continue looking uphill for just a second until your board is firmly planted. Then turn and ride away smoothly.

Tips:

  1. Try to land a little bit on your toeside edge at first to avoid catching your heelside edge as you come around. Then get used to landing flat-based.

How To How To Do An Indy Grab

An indy grab is the quintessential "first trick". Once you get the hang of it, you can experiment with style by trying it tuck-knee or by boning it out (straightening your front leg).


Difficulty: Easy
Time Required: Practice


Here's How:

  1. Ride straight at a roller with the base of your board flat.
  2. Spring off the lip of the jump.
  3. Don't bend over at the waist! Instead, suck your legs up so that your board will meet your hand.
  4. Grab your board on the toeside edge between your feet with your rear hand.
  5. Put your other arm into the air.
  6. Let go of your grab and extend your legs for the landing.
  7. Absorb the landing and ride away.

Tips:

  1. As you improve, try adding an indy grab into your spins. But to sound cool, remember this: "indy" infers a backside spin; i.e. indy is never frontside. If you spin frontside and grab between your feet it is called a "frontside" grab.

Snowboarding Injuries

As the sport of snowboarding grows, so does the number of snowboarding-related injuries. Wrist injuries are by far the most common of all snowboarding injuries, followed by ankle and knee injuries.


Wrist injuries tend to occur when snowboarders fall backward and try to catch themselves with their arms. The instinct to extend one or both arms to catch a fall is hard to curb, but snowboarders should be advised to try to keep their arms safely tucked in. It is better to roll out of a fall, distributing impact over a greater portion of the body. Beginning snowboarders are at particular risk for wrist injury, most likely because beginners accumulate a greater number of backward falls at slower speeds than more advanced riders.


Wrist guards are the best protection against injury, but are not a sure thing. Snowboarders have suffered wrist injuries despite wearing wrist guards, suggesting a need for more snowboard-specific wrist protection. However, wrist guards are still the best method of injury prevention, and are especially important during the first week of learning to snowboard. Some glove manufacturers make gloves with integrated wrist protection. Wrist guards made for inline skating or skateboarding can also work for snowboarding, and can be worn either under or on the outside of mittens or gloves.
Ankle injuries can also occur while snowboarding, and are more common among riders who prefer a soft boot. Riders who opt for stiffer lace-up boots or
alpine/carving boots are less likely to have ankle injuries, but may be more prone to knee injuries.


Helmets are increasing in popularity in many sports, snowboarding included. Head injuries can occur due to impact with hard snow or ice as well as trees and other objects. Helmets are an essential component of any snowboarder's protective gear, regardless of ability. Several helmets are on the market that have been developed specifically for sports such as skiing and snowboarding, including helmets designed for kids.


Taking a lesson is always the best way to start snowboarding, and can be a great way to reduce the risk of injury. Experienced snowboard instructors can teach beginners how to fall as well as how to stay up, and both can be vital skills to have for an enjoyable day on the slopes.

How To Snowboard For The First Time

Learn To Snowboard Step 1: Preparation Dress in comfortable, loose-fitting snow clothing. Don't forget gloves, goggles and a hat. Wrists are very vulnerable, especially for beginners. Consider wearing a pair of wrist guards and a helmet.


Learn To Snowboard Step 2: Get Into The Bindings In a flat area with the snowboard in front of you, place your front foot in the front binding.

If you have strap bindings, strap both the toe and ankle strap until they are snug. If you have step-in bindings, step in and roll your foot around to make sure it is properly secured. Repeat with your back foot. Bounce around a little bit to see what it feels like to be strapped into a snowboard. Now, take out just your back foot (leave your front foot in its binding).


Learn To Snowboard Step 3: Baby Steps Take a few steps up a slight incline with your front foot in the snowboard binding and your back foot out. For this to work you need to start by facing your shoulders and toes directly up the incline with your snowboard going perpendicular to the incline. Take one step with your foot that is not attached to the snowboard, then lift your foot with the snowboard attached to it and take a step with the entire snowboard (keep it perpendicular to the slope). Keep taking steps until you are a little ways up an incline.


Learn To Snowboard Step 4: The Heelside Slide Sit down and strap both feet into the snowboard. With your snowboard perpendicular to a small slope, stand up so you are looking down the slope. Your weight will be mostly on your heels. Now point your toes on both feet just a little bit and you will start to slide down the hill. Pull back up on your toes to stop. Repeat this until you get the hang of pulling up on your toes to come to a stop.


Learn To Snowboard Step 5: Skating "Skating" is an essential skill to have for maneuvering through flat areas and getting on the chairlift. It refers to the way snowboarders push themselves along using their back foot while the front foot is in the binding. Practice skating around for 10 or 15 minutes before you go near the chairlift! Push off the snow with your back foot and slide your front foot forward with the snowboard. Your back foot can push from either side of the board, so try it first on one side and then on the other to see if one is more comfortable for you.


Learn To Snowboard Step 6: Simulate Getting off the Chair Go to an area with a slight incline and secure only your front foot in its binding. Point your snowboard down the incline, put your weight on your front foot and start to glide down toward the flat area. Just as you start sliding, place your back foot on the
stomp pad alongside the rear binding. Glide to a stop.


Learn To Snowboard Step 7: Get On and Off the Chairlift Once you feel comfortable skating around in a flat area and gliding to a stop from a slight incline, you are ready to head for the chairlift. Every resort has a beginner lift -- find it. From a safe distance, watch how other snowboarders get on the chairlift until you understand the basic technique.


Learn To Snowboard Step 8: The Falling Leaf Pattern Now that you are at the top of a beginner slope, you are going to slowly slide back and forth across the hill like a "falling leaf," staying on your
heelside edge the entire time.

To begin sliding, press down with the toes of your front foot. To stop sliding, pull back up with the same foot. (Treat it like a gas pedal.) When you reach the edge of the run, stop and press down with the toes of the other foot to start sliding in the other direction. Again, pull up to stop. Continue to the other side of the run. Repeat this back and forth "falling leaf" pattern all the way to the bottom of the run.
On the next run, try this same thing but on your
toeside edge. To begin sliding from your toeside edge, push down with the heel of your leading foot. Pull it up to stop.


Learn To Snowboard Step 9: The J-Turn Once you are comfortable with the falling leaf on both your heelside and toeside edges, you are ready for the J-turn. The J-turn uses the same technique as the falling leaf, but your goal is to point the snowboard directly down the slope for a moment before turning and coming to a stop. Again, start on your heelside edge. Looking down the slope, press on the toes of your leading foot to begin sliding. Keep pressing on your toes until you are going directly down the slope, then pull up on your toes to go into a heelside turn and come to a stop. Repeat. Continue doing J-turns on your heelside edge all the way across the run.
Now try a toeside J-turn. Flip over so you are standing on your toeside edge. Press on the heel of your leading foot to begin sliding. Keep pressing on your heel until you are going directly down the slope, then press on your toes to go into a toeside turn and come to a stop.


Learn To Snowboard Step 10: Linked Turns Got the J-turns down? You are just moments away from linking turns. All you have to do is put your heelside and toeside J-turns together. As soon as you finish a heelside turn, press down on the toes of your front foot to start heading downhill again and continue pressing on your toes right into a toeside turn. Now press down with your heel to start heading downhill and continue pressing with your heel until you complete a heelside turn.

Before Buying A Snowboard


There are so many good snowboards to choose from. The trick is to find the board that is best suited for you. Following are the top 5 things to take into consideration when shopping for a new snowboard.


Type of Snowboard - Freestyle, Freeride or Race
There are 3 main styles in snowboarding: freestyle, freeride and freecarve/race. In terms of numbers, snowboarders are pretty evenly split between freestyle and freeride, while race boards are more rare - you probably already know if you're in this category. Manufacturers design boards for each of these styles of riding, so it is good to have a basic understanding of where you fit before you shop.


Snowboarding Styles

In the few decades that snowboarding has been around, a few distinct styles have emerged within the sport. These styles are characterized by their preferred terrain, their specific equipment and their own competitions.

It is important to know what type of snowboarder you are -- or are interested in becoming -- before you drop your savings on a new board/boots/bindings setup. Manufacturers carefully design boards for specific types of riding, and you don't want to make the mistake of buying a $450 big mountain board if you're going to spend all day in the pipe.


Freestyle
Freestyle riding is the flavor of the day. This style focuses on jumps, tricks, rail slides, halfpipes and switch riding.

Snowboard movies typically showcase freestyle riding; it is fun to watch and where pros can really show off their skills.
Many resorts design and maintain snowboard parks for freestyle riders with jumps, rails and halfpipes.
Freestyle equipment uses a soft boot and a relatively short, maneuverable board. A general freestyle board will be designed to handle well on jumps, spinning in the air and riding switch.


Some freestyle boards are designed specifically for the halfpipe alone or for the perfect rail slide. If you can afford a board for every occasion, these specialty boards will ride extremely well in the condition for which they were designed -- but are not likely to perform well outside of that specific terrain.


The most popular snowboarding events are freestyle competitions. These include halfpipe, quarterpipe, slopestyle and big air competitions.


Freeride

Whether just learning to link turns or pushing the limits of an Alaskan descent, freeriders prefer the all mountain experience: open terrain, backcountry chutes, fresh powder, trees -- as well as an afternoon spent in the park or in a freshly cut pipe. This is the realm where pros can show what they are really made of; it is a conversation between rider and mountain.


Freeriding is the most general style of snowboarding and has correspondingly versatile equipment. Like freestyle, freeride equipment uses a soft boot. Boards in this category are relatively longer and more directional in their shape. If you don't know what kind of terrain you like, or know that you like everything, this is your category.


Freecarve / Race

This often overlooked style of snowboarding focuses on carving and racing. Sometimes called alpine snowboarding, freecarving takes place on hard-pack or groomed runs and focuses on the ultimate carving turn. Little or no jumping takes place in this discipline.


Freecarve equipment is comprised of a hard boot and plate binding system, while the boards are stiff, narrow and relatively long.


Style of snowboarding includes competitions that are modeled after ski racing, such as the parallel giant slalom - an Olympic event in which racers maneuver around gates or poles.


Decisions, Decisions
you are just starting out, avoid highly specific equipment; i.e., boards that are only designed to perform well in one environment. As a new snowboarder, you will want to round out your skills on a variety of terrain without your gear holding you back. Beginners should look for a good all-around design, most likely a freeride or freestyle setup.


Your first season also, you will be able to discern if you want to specialize in one type of riding or another. You may decide that you can afford a couple different boards -- maybe a long freeride board for powder and a shorter freestyle board for days in the park. Just be sure to understand riding styles before you buy, then look for equipment that is well-suited to your needs.

Basic Equipment Used For Snowboarding


If you are heading out on your first snowboarding holiday and need to know a bit about the kind of equipment used for snowboarding, you will need to find a good snowboarding equipment outlet where you can find the type of board to suit your skill level as well as other essential snowboarding equipment. The first and most important equipment used for snowboarding is obviously the snowboard and you may be surprised at first at the size of a regular board.


To find equipment used for snowboarding that suits your personal build is very important. The snowboard should reach up to your chin when standig on its end. There are exceptions such as heavier people need to choose a board that is longer and not so flexible. Also, if you are a light person, the board could be somewhat shorter and also more flexible.


The width of the snowboard should be enough to prevent the feet from hanging over the edge and bigger feet necessarily require wider boards. One should also know that in the equipment used for snowboarding, snowboards can either be freestyle/freeriding or Alpine.


The Basic Kit - snowboard, boots, clothes, glasses and helmets


Next in line in the equipment used for snowboarding is the boots. They need to fit well and should also be comfortable. Comfort is essential. Not having the boots that fit correctly can inhibit control of snowboarding movements and correct fitting boots would boost self confidence and help in more adventurous snowboarding activities.


There are generally two kinds of boots. The soft snowboarding boots and the hard snowboarding boots. Soft boots are light and provide good support and are most often used by beginners

and are made up of an inner liner that is good for support and also an outer layer that provides traction and shock absorption and are flexible for performing tricks. Hard boots go hand in hand with Alpine snowboards and are quite like ski boots having a rigid back from the heel up and provides better edge when turning.


Your bindings are a piece of equipment used for snowboarding that can make or break your snowboarding experience both in terms of safety and the enjoyment you get from your ride.


There are two types of bindings; one is the strap bindings and the other step-in bindings. Strap bindings are for beginner snowboarders and are mostly attached to the board, especially rented boards and have a high back plate to support the ankles and are similar to the support provided by the back of the ski boot. The strap-in bindings cause a lot of inconvenience as it involves a lot of bending to tighten the straps. Other equipment used for snowboarding includes clothing, glasses and helmets.

Board's specifications

Overall Length
Overall length is the full length of the snowboard from tip to tail. It is usually measured in centimeters. When you hear that a board is a 155, for example, it simply means that the total length of the board is 155 cm.

Running Length
Running length is the length of board that is actually in contact with the snow. This is measured as a straight line from the nose contact point (where the flat base ends and the nose begins) to the tail contact point. A freestyle board may have a longer running length than a freeride board of the same overall length. This is because the freeride board has a longer nose length.

Effective Edge
The effective edge measures the length of edge between the nose and tail of the board that is in contact with the snow. It is similar to running length, but measured along the curved edge rather than in a straight line, making it a slightly higher number.

Sidecut Radius
Imagine a giant circle overlapping the edge of the snowboard. Depending on the radius of the circle, the sidecut will be tighter or more mellow. A higher number is typically less aggressive and more stable, while a smaller radius is more performance driven. Some companies have 'progressive' sidecuts which is a combination of more than one radius. This allows the board to have the characteristics of one radius to initiate the turn and another radius to complete the turn.

Sidecut Depth
The sidecut depth measures how far into the edge of the snowboard the sidecut radius (giant circle) cuts away. Draw a straight line from the widest part of the tail to the widest part of the nose. The distance between that line and the waist of the board is the sidecut depth.


Waist Width
The waist width is the width of the snowboard at its most narrow point. It is basically the width at the middle of the board.
Nose Width
The nose width is the widest part of the snowboard's nose.
Tail Width
The tail width is the widest part of the snowboard's tail.


Nose Length
The nose length is measured from the forward contact point of the board to the tip of the nose. If you put the board on the ground and measure from where the nose starts to kick up to the end, this will be the nose length. Freeride boards have a longer nose length to help the snowboard float through the snow.
Tail Length
The tail length is measured from the rear contact point of the board to the tip of the tail. If you put the board on the ground and measure from where the tail starts to kick up to the end, this will be the tail length.
Nose Height
This is the highest point of the nose from the ground. Place the board on a flat surface and measure from the tip of the nose to the ground.
Tail Height
This is the highest point of the tail from the ground. Place the board on a flat surface and measure from the tip of the tail to the ground.


Stance WidthThe stance width refers to the range of stances available on a particular snowboard. Here are some tips for
determining your stance.


Stance Location
The stance location refers to where the inserts are placed in relation to the center of the snowboard. With a centered stance (0 offset), the inserts are centered on the board over the sidecut. Most freestyle boards have a centered stance, which makes doing tricks and riding switch easier. Boards can be offset as much as 2.5" back of center – meaning if you find the middle of the board, the inserts are slid back towards the tail 2.5 inches. Most freeride boards have some offset. The more your stance goes back towards the tail, the easier it is for the board to float through the snow.


Snowboard Insert Patterns
Insert patterns can be (1) a slider system, (2) a proprietary system such as the Burton 3-hole pattern, (3) a 4x2 pattern or (4) a 4x4 pattern.
The slider system provides nearly unlimited stance options. The bindings are mounted to a track system and can be slid forward or backward to dial in the perfect stance width.
Burton uses its own 3-hole pattern. In the past, you had to use Burton bindings, but today many binding companies provide a disc that is compatible with the Burton insert pattern.
4x4 was the standard for several years with 4x2 becoming more common. They both use a 4-hole disc, but the 4x2 pattern offers more stance options because the inserts are closer together.

what is snowboard?

A snowboard is a piece of equipment an athlete rides on while snowboarding. In order to snowboard, this board is attached to the athlete’s feet with special bindings. He or she then rides down ski slopes or other snow-covered slopes using nothing but the snowboard. Unlike skiing, the sport of snowboarding does not involve the use of poles. The snowboard is similar to a surfboard or a skateboard in that it serves a similar purpose for the athlete.

When purchasing a snowboard, the athlete must consider his or her weight, height, and shoe size. In general, a snowboard should be about one foot shorter than the rider. When stood on its tip, the other end of the snowboard should reach to between the athlete’s chin and collarbone. An athlete that is on the heavier side should purchase a wider snowboard, as should an athlete with bigger feet.

The type of snowboarding the athlete performs also has an impact on the size the snowboard should be. Those wishing to freestyle should purchase a snowboard that is wider, smaller, and more flexible. They should also wear soft boots when riding.

A slalom snowboard, on the other hand, is longer and stiffer. When it comes to racing, the snowboard should also be very stiff and long. In this case, the athlete should wear hard boots. No matter the use of the snowboard, all designs have metal edges and an upturned lip on at least one end.

The snowboard was first invented in the 1970s and was inspired by the design of surfboards. When first invented, the sport of snowboarding was not very respected by skiers. Instead, it was viewed as a fad. Many resorts refused entry to snowboarders, and ski companies scoffed at snowboard companies. Today, many ski companies are coming out with their own snowboard designs and are also borrowing the technology used on the boards to create new ski designs.

Injuries related to snowboarding are as common as injuries to alpine skiers. Usually, injuries occur when the athlete attempts to perform maneuvers beyond his or her ability level. The majority of injuries are to the wrist. To prevent injuries while riding on a snowboard, it is best to start slowly and to wear wrist guards and a helmet.

Pictures

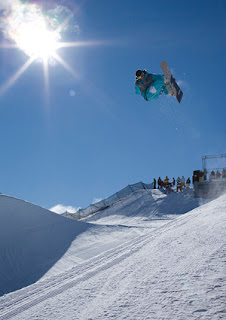
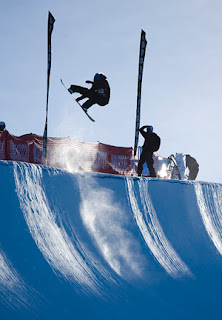
Halfpipe in the Air


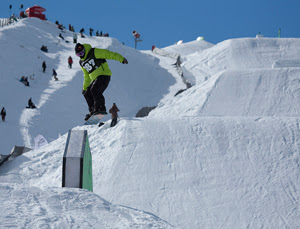
Slope Style


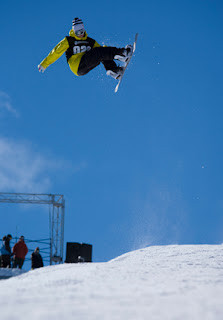
QuaterPipe